Best Guide for Sega Saturn ModChip Install 64/32
Feb 6, 2011 16:11:37 GMT
Post by wyndcrosser on Feb 6, 2011 16:11:37 GMT
www.segastyle.com/model264.html
This is the best guide for 32 and 64 pin saturns, also sanyo boards. The pictures are great.
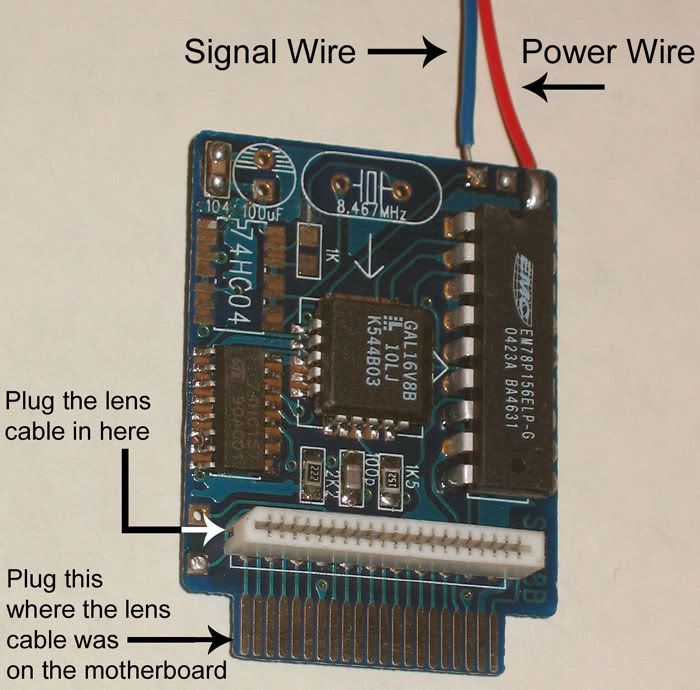
I used this to verify the placement of the lens ribbon, which was difficult from the vendors pictures on his site.
My Modchip is from Racketboy.com. The vendor is from Michigan, so they shipment was here in less than a day.
www.racketboy.com/store/sega-saturn/sega-saturn-modchip.html
For the 64bit console, all you need is to solder the red wire to the 4th socket of the power row. There's five on some model 2's, you count from the front of the console up, until you hit number four.
Then I simply soldered A->B on the back of the board, which didn't require me to solder into the 64 chip.
Also, be aware you will need to slightly bend the metal of the shielding near the ribbon insertion point to fit the modchip.
The saturn ribbon will have to go over the modchip as well, with the blue line of the ribbon facing towards the ceiling (you'll see from the pictures and the ribbon in your hands what I'm talking about). It's highly reccommended to tape down the ribbon to avoid it pulling out.
I used a soldering gun that was way to hot for the job (from work), but I was able to goop on enough solder to do the job. Be aware that you may loosen the wires from racketboy's modchip, as they aren't soldered on great (which that doesn't matter if you do the A--->B mod).
Also, I wanted to point out that I have to at times, load the saturn with the disc in. and when it comes to the play a disc channel, I have to press the "open" button button and close the lid again. This will activate any issues with games only showing up as audio CDs (also mentioned on Segastyle).
Lastily, On the back of the board, with newer consoles (esp Model 2), you'll want the solder bridges for 0019 and 0014 to be set up differently. This is listed on the segastyle page, for better clarification.
Just my key points, the total install took me 5 minutes, and most of that was trying to locate a better soldering iron.
Good Luck.
Wynd